Sunday, June 24, 2007

Slot Cutter for T-Molding


Tracked down a 1/16" slot cutter for my router. This is a hard bit to find! Found one at a local Lowe's for $16 (with tax). They're $20 + tax at Home Depot. So far, this has been my general experience with prices at Lowe's vs Home Depot. I'll use this bit to cut the slot around the edges of the cabinet so I can insert the t-molding.

In the image, the distance B is the 1/16 edge that will cut into the plywood.

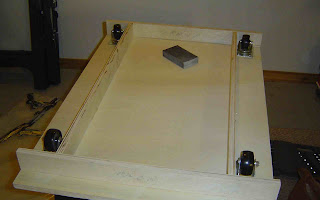
Base completed with casters


Got the base completed, including casters. I used 2.5" casters and as you can tell from the photo, there's about a 3/4" clearance. Took it for a spin in the basement area where it'll go and it rolls fine. And, miracle of miracles, it's level. The arcade cabinet won't tilt!


Saturday, June 23, 2007

Got the base built


Got the base built. Only one support piece isn't flush with the cabinet bottom edge but a little sanding will fix that. I've got the L-brackets to mount the cab sides but I want to cut the t-molding slot before connecting them, so that's my next step. Actually, the next step is finding a 1/16" slot cutter - may have to order it as I haven't found anyplace that sells it locally.

Tuesday, June 12, 2007

Smart Strip arrived


I just got my Smart Strip from bitsltd.net - it will allow me to plug in the PC to the "Control Outlet" - when the PC is turned on or off, power to the other devices (monitor, speakers, etc) is turned on, too... very convenient and a power saver.

Has built-in surge protection and spike blocking, too.

Sunday, June 10, 2007

Cutting the Cabinet Part 4


So, there they are... all the wood cabinet parts. I've wrapped the side panels because it was supposed to rain on my ride home, but luckily that didn't happen.


Everything is now unpacked in my own workshop and I'm ready to start assembling. A summary in case anyone is interested:


Started at 9am


Lunch at 12


Picked back up at around 12:45


Finished at 3pm


All in all, 2 man job took about 6 hours. I had fun... it's always good to spend some time with Dad in the workshop and catch up on things. More later...


Cutting the Cabinet Part 3


Dad had some great tools that I don't have, including a nice belt-driven sander. In a few of these images, you can see the control panel sides... we clamped them together and then gave them a quick run through on the sander. We were able to do this on all the various pieces that had matching pairs.


Also in this batch of images are the 2 control panel tops.

Cutting the Cabinet Part 2


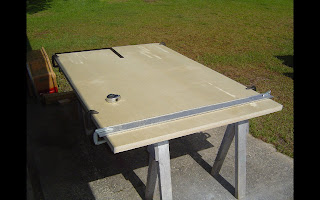
In these images, you'll notice that piece of long metal that looks like siding. That thing was invaluable. We would draw our lines, then clamp this metal guide 5.75 inches to the right of the line. This was the guide that let us use the circular saw with very good accuracy. The metal guide can be separated into 2 pieces for smaller runs.
The sander you see wasn't to even up the edges but to take off the little slivers that inevitably happened along the edge. Just one quick pass down each long cut and the burrs were gone.

Cutting the Cabinet Part 1

FINALLY got away to spend a few days at my dad's workshop to cut the cabinet pieces. I've been ordering my components, bit by bit, but this is the part I've been anticipating most. I'll post some pictures below with some comments and will continue posting images as I put together the cabinet...

First images here include the side panels being cut. My dad and I worked together with the rule of double-checking each other's measurements. The great part is that I made a few mistakes that he caught and I caught some of his... so going slow and measuring twice (and sometimes more often) definitely paid off and we made all the cuts correctly the first time and I didn't have to invest in more than the original 3 sheets of Sandiply.
Speaking of sandiply - this stuff was great to work with. Not too heavy. EXTREMELY smooth on the "good side" and DECENTLY smooth on the "bad side." There were ZERO snags/splintering of the edges and all pieces were flat and no warping. I've not worked with warped plywood before so I can't speak to how much work this might have saved me, but I can tell you it made measuring and marking the cutouts much easier.
In one of the images you'll notice that we clamped two sheets together. "Good sides" were placed together so that when we cut out the side panels they will be mirror images of one another and I can use the smooth side. This also saved time and I only had to draw one side panel on the wood. We used a circular saw set to 1.75 depth and it cut through both sheets easily. No sanding was required to "match" the sides. That said, it was very helpful to have two sets of hands and eyes to do this.

Thursday, June 7, 2007

Got delayed a bit...

This weekend my dad is helping me do the wood cutting. I'm going with a product called Sandiply (from Home Depot) - it's plywood, very flat, and sanded smooth on one side. I just don't want the hassles of MDF dust and weight and am willing to put in the time to prepare the wood so the final cabinet looks good. It costs about $7 more per sheet than MDF, but I think the smooth side combined with the lack of warp (common in plain plywood) will make it worthwhile.

I'll be posting pictures of the progress next week - including layout and cutting of the wood. I'll be doing this on the byoac.com website under the 'Project Announcements' section. Do a search for "Saucer Invasion" to find it.